
Strata

Getting started

Install Strata and prepare your Shopify store.

Add Strata from the Shopify Theme Store and prepare it as a draft before changing the live storefront.

Safe setup

Install and prepare Strata
Use Shopify’s official Theme Store flow so the theme is connected to the store where it will be used.
  1. Find Strata in the Shopify Theme StoreOpen the Shopify Theme Store, search for Strata, and open the Strata theme listing.
  2. Add the theme to your storeSelect Try theme and choose the Shopify store where you want to use Strata. Shopify adds it to Draft themes in your admin.
  3. Open the Theme EditorFrom Online Store → Themes, find Strata under Draft themes, select Edit theme, and confirm the template you are editing.
  4. Preview before publishingSave changes as you work and review the theme on desktop and mobile while it is still unpublished.

Find your way around the Theme Editor
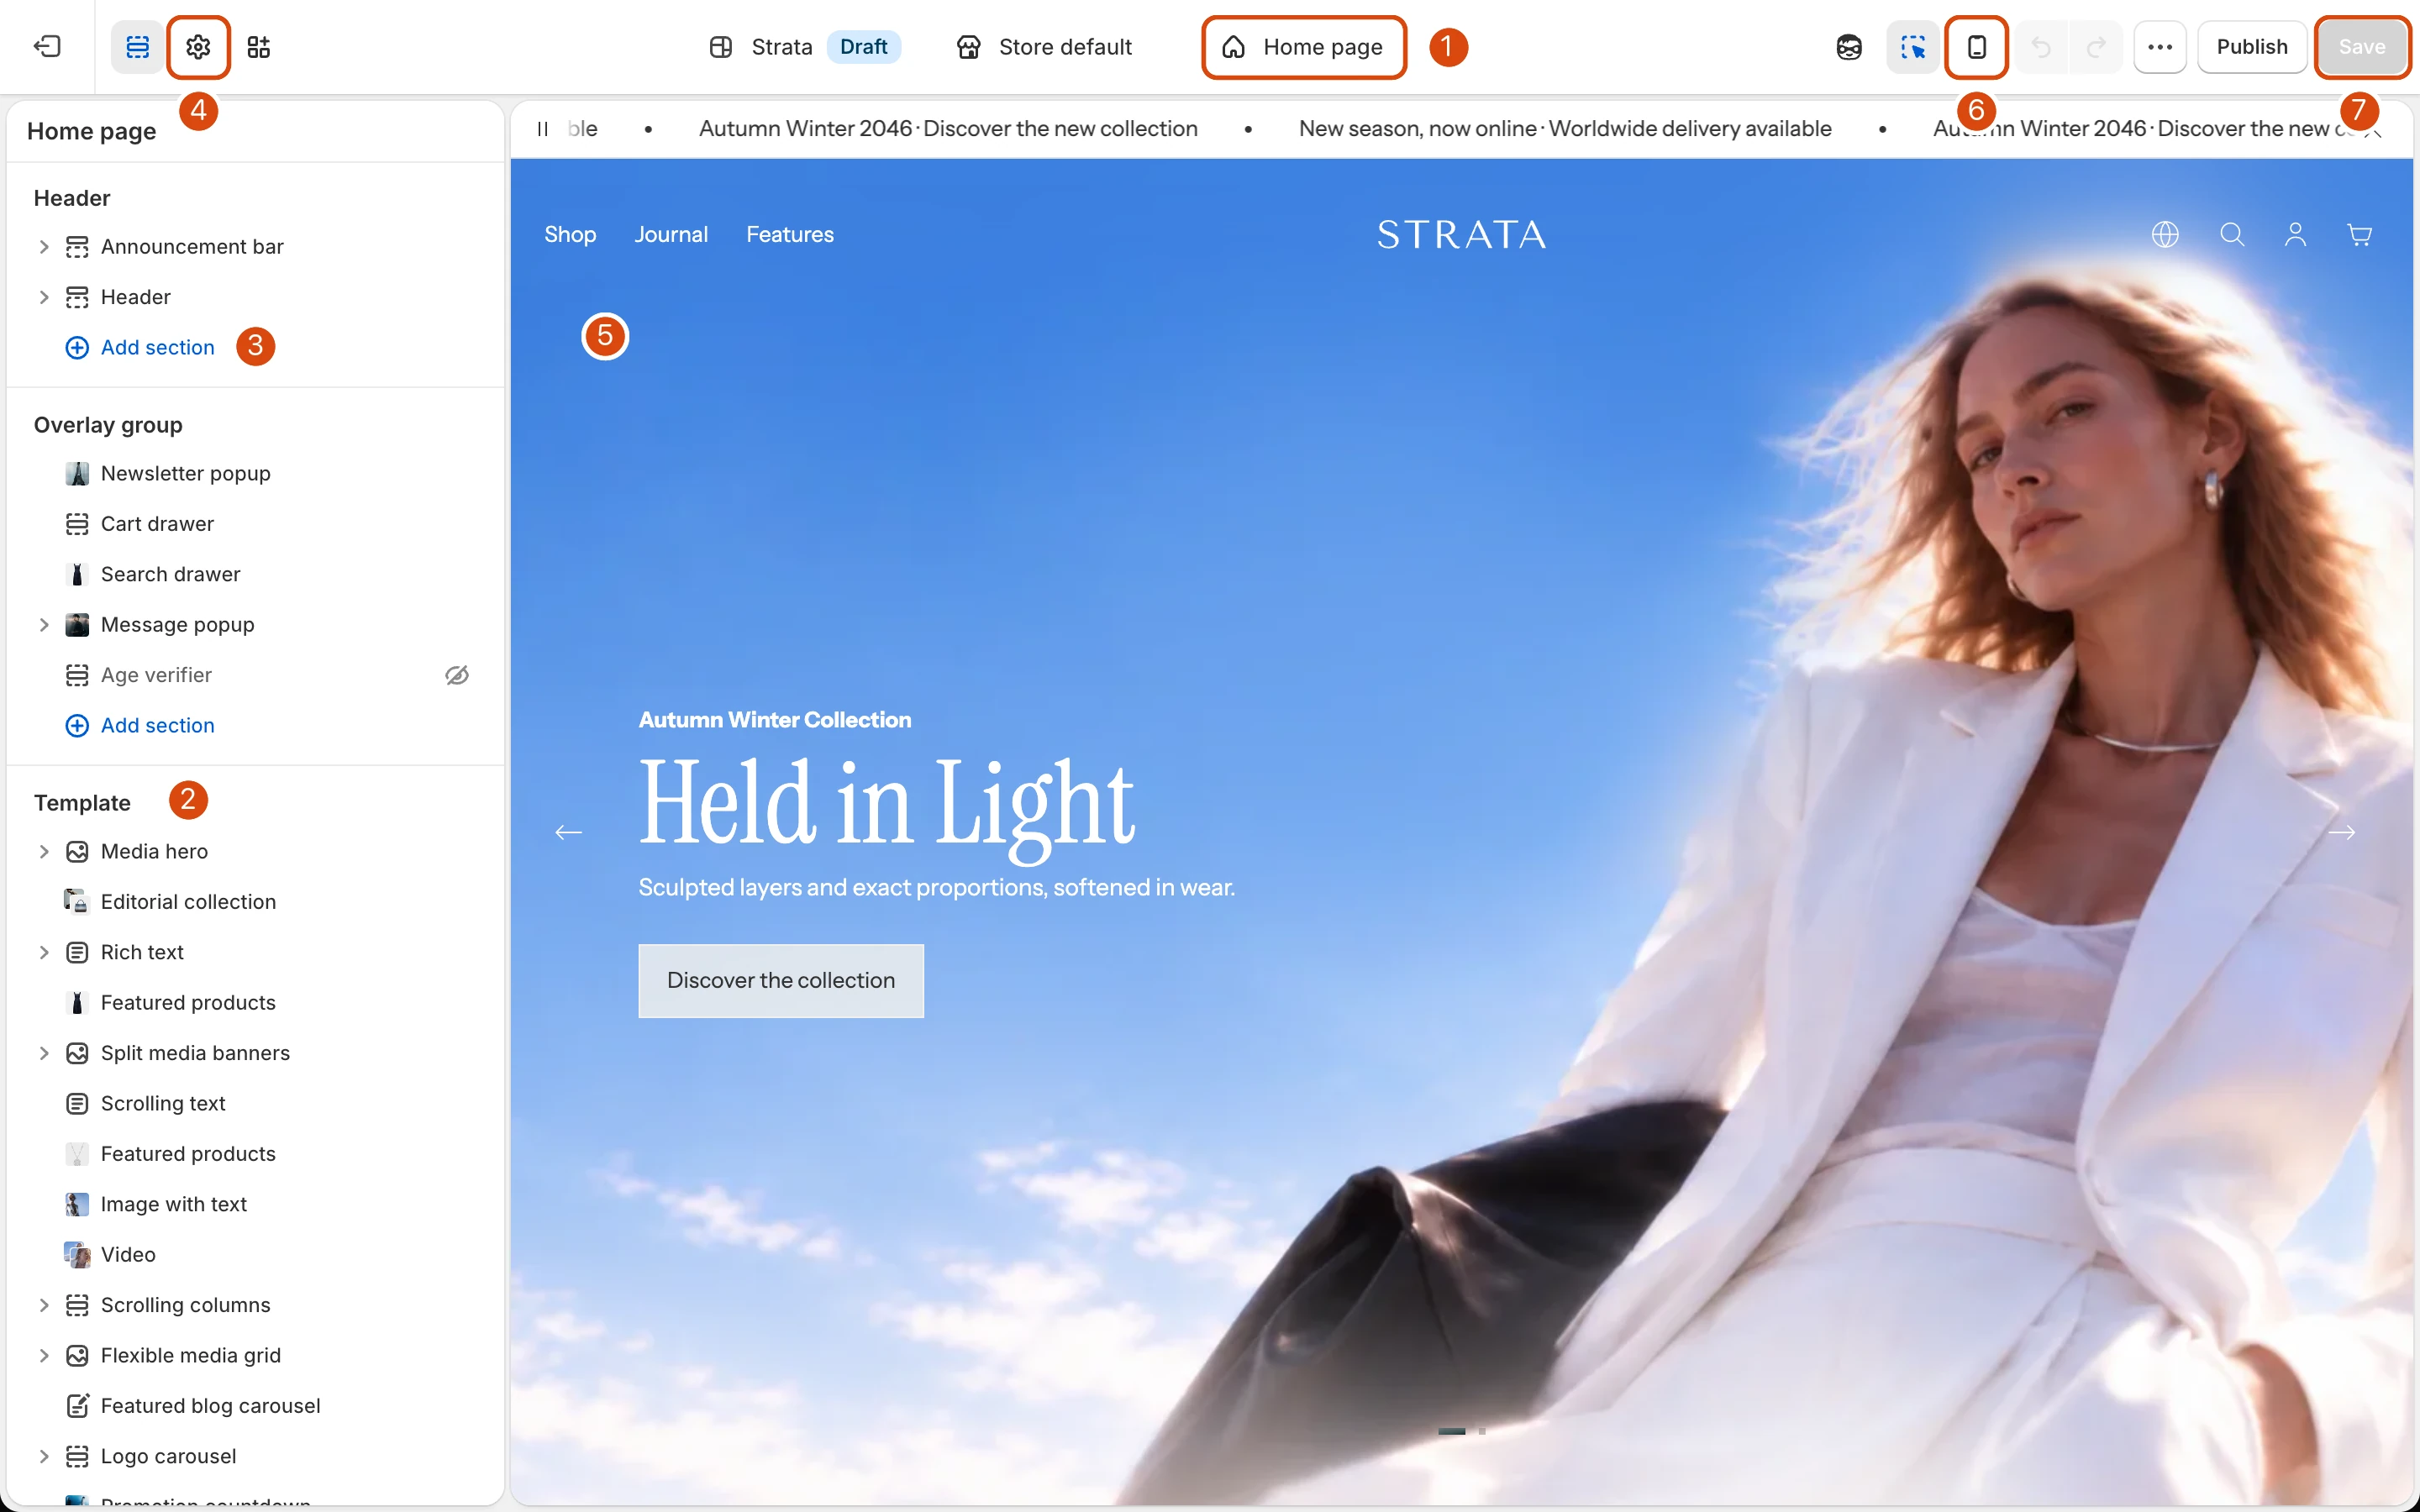
The Shopify Theme Editor with Strata. Numbered markers point to the page selector at the top (1), the section list in the left sidebar (2), an Add section link (3), the Theme settings gear icon (4), the live preview (5), the mobile preview button (6), and the Save button (7).

The Theme Editor. The numbers match the list below.

The Theme Editor is where you change Strata. It shows a live preview of your store with the settings beside it. The numbers in the screenshot match the list below.

  1. Page selector. Choose the page you are editing, such as the home page, a product page, or a collection page. Each type of page has its own template.
  2. Section list. Lists the sections on the current page, in order, grouped into Header, Overlay group, Template, and Footer. Select a section to open its settings. Select the arrow beside it to show its blocks.
  3. Add section. Adds a new section to that group. Each Strata section guide says where the section can be added.
  4. Theme settings. Opens the settings shared by the whole theme, such as colors, typography, and cart behavior.
  5. Preview. Shows the page as shoppers see it. Select any part of the preview to open the section that displays it.
  6. Mobile preview. Switches the preview between desktop and mobile widths.
  7. Save. Saves your changes to this theme. Saving a draft theme does not change your live store; publishing it does.

Switch to another page
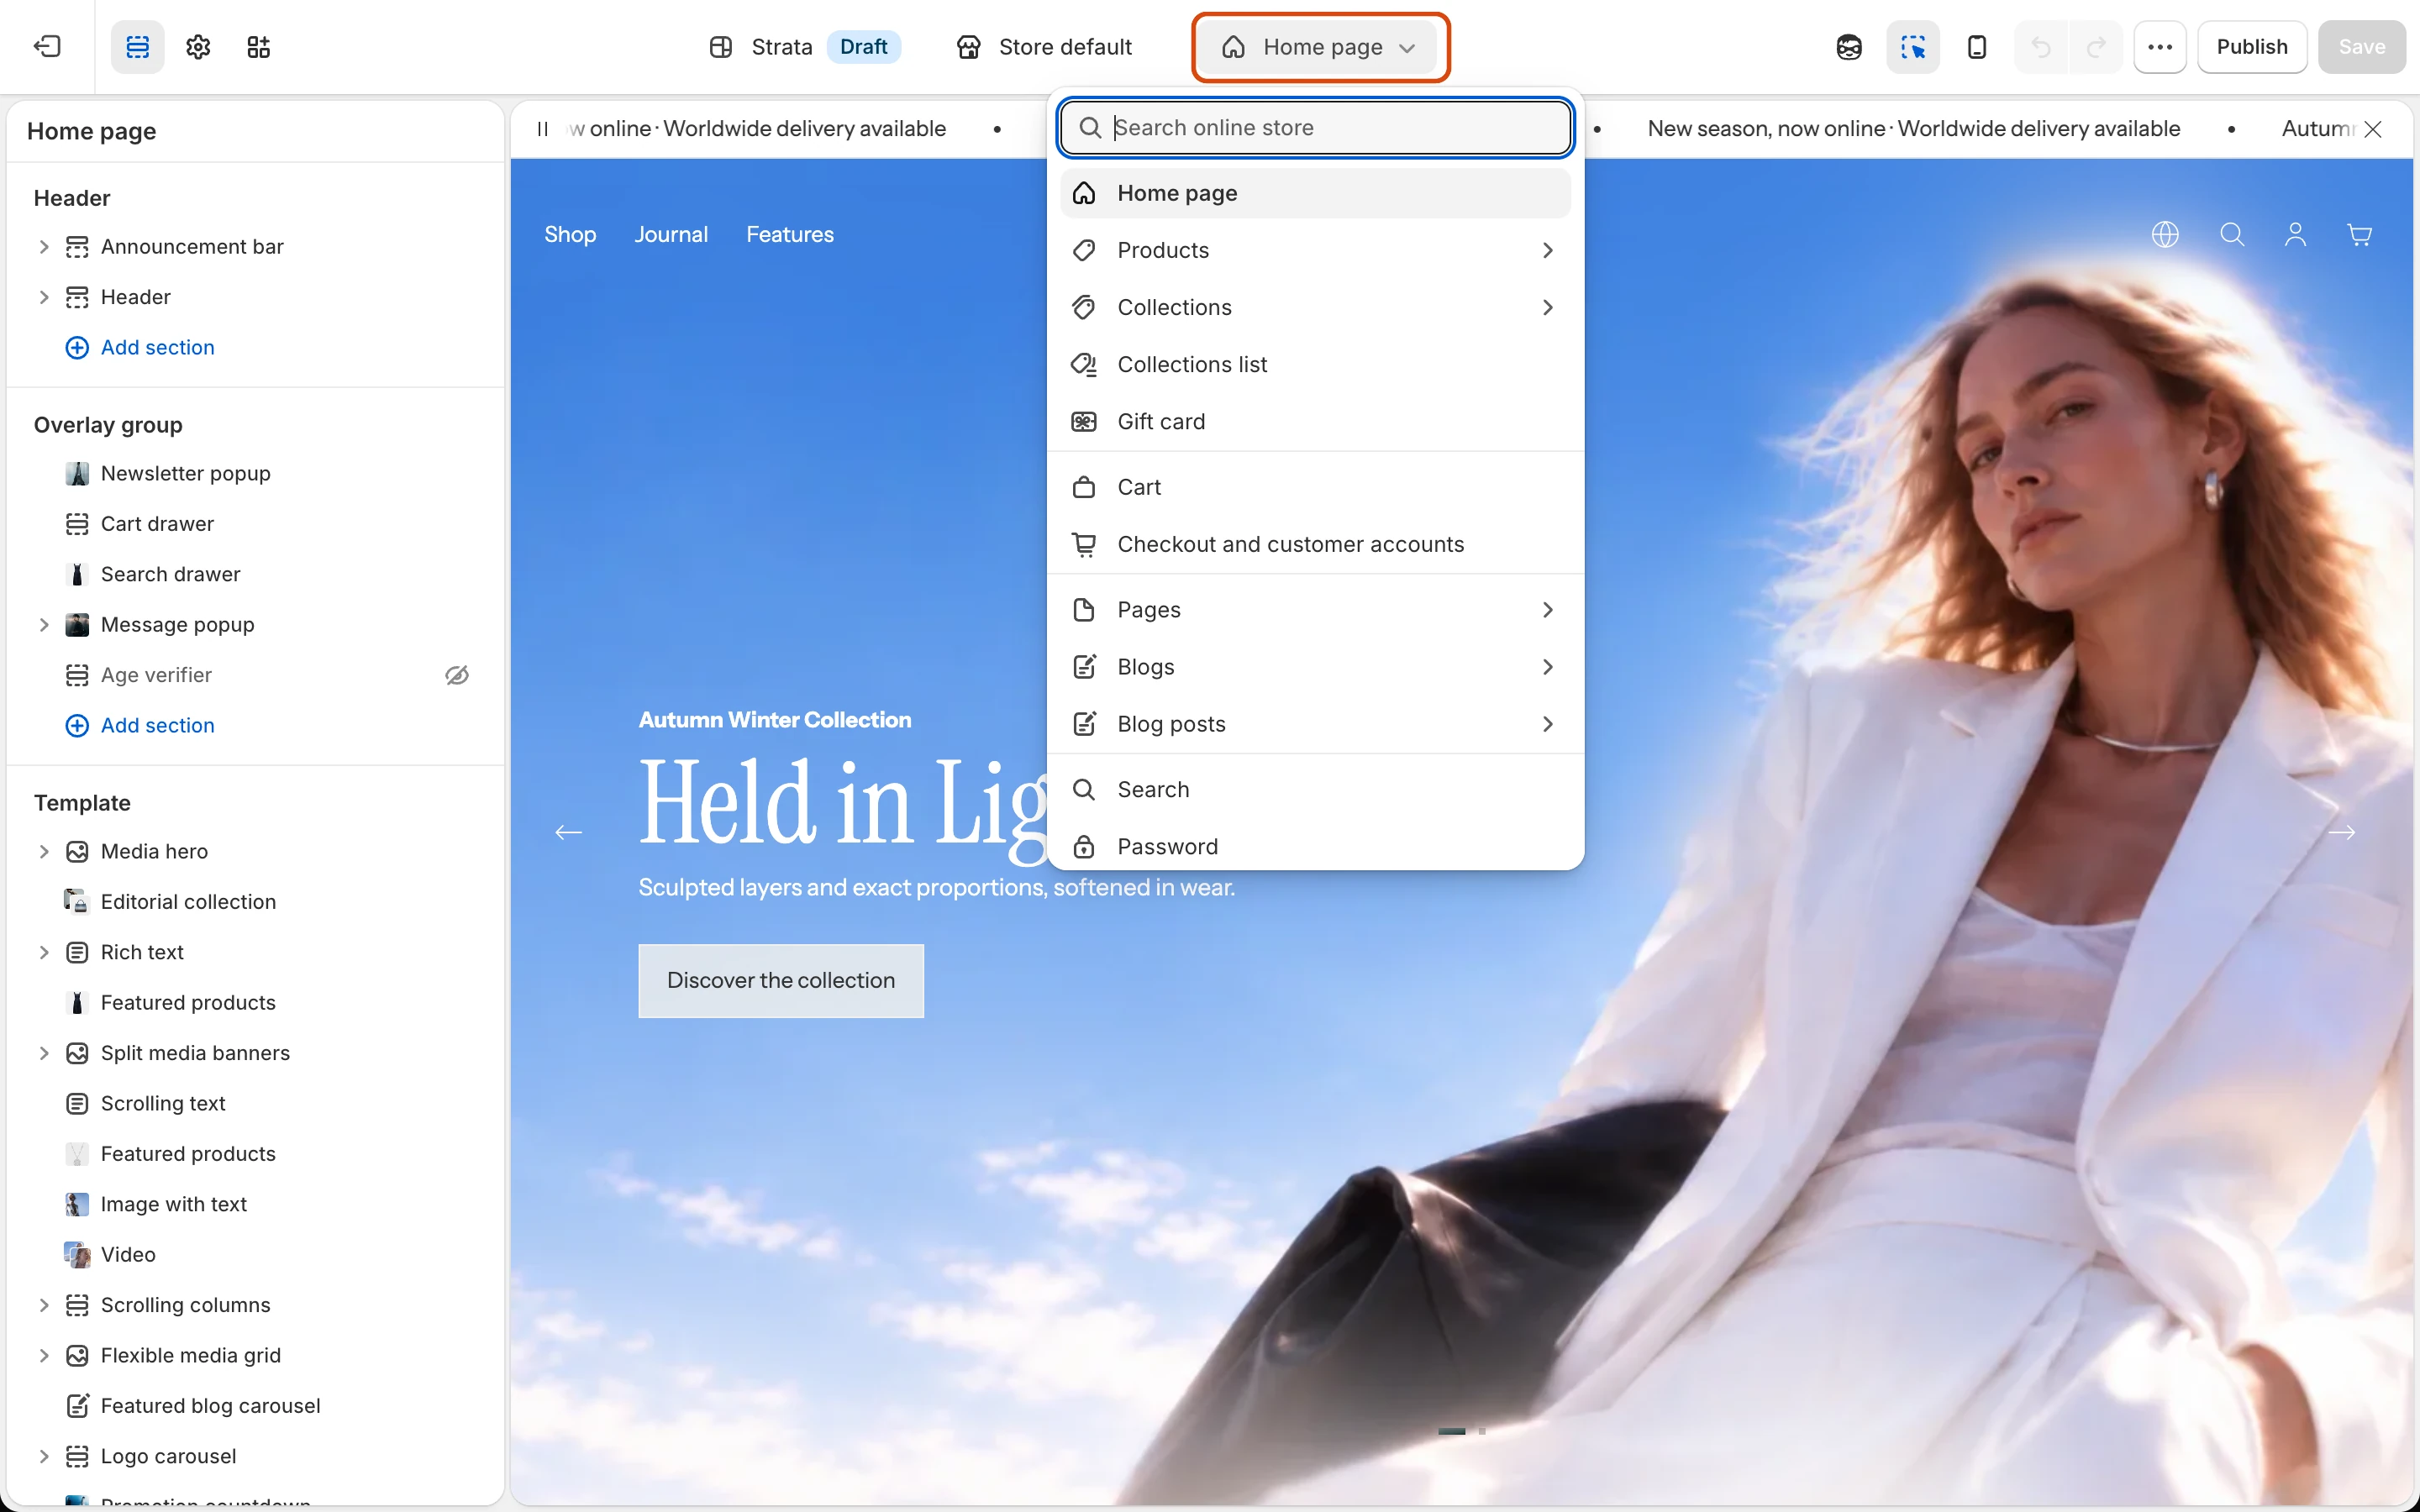
The page selector open at the top of the Theme Editor with a list of page types: Home page, Products, Collections, Collections list, Gift card, Cart, Pages, Blogs, Blog posts, Search, and Password.

Select the page selector (outlined), then choose a page type. Items with an arrow open a list of specific products, collections, pages, or posts.

Add a section
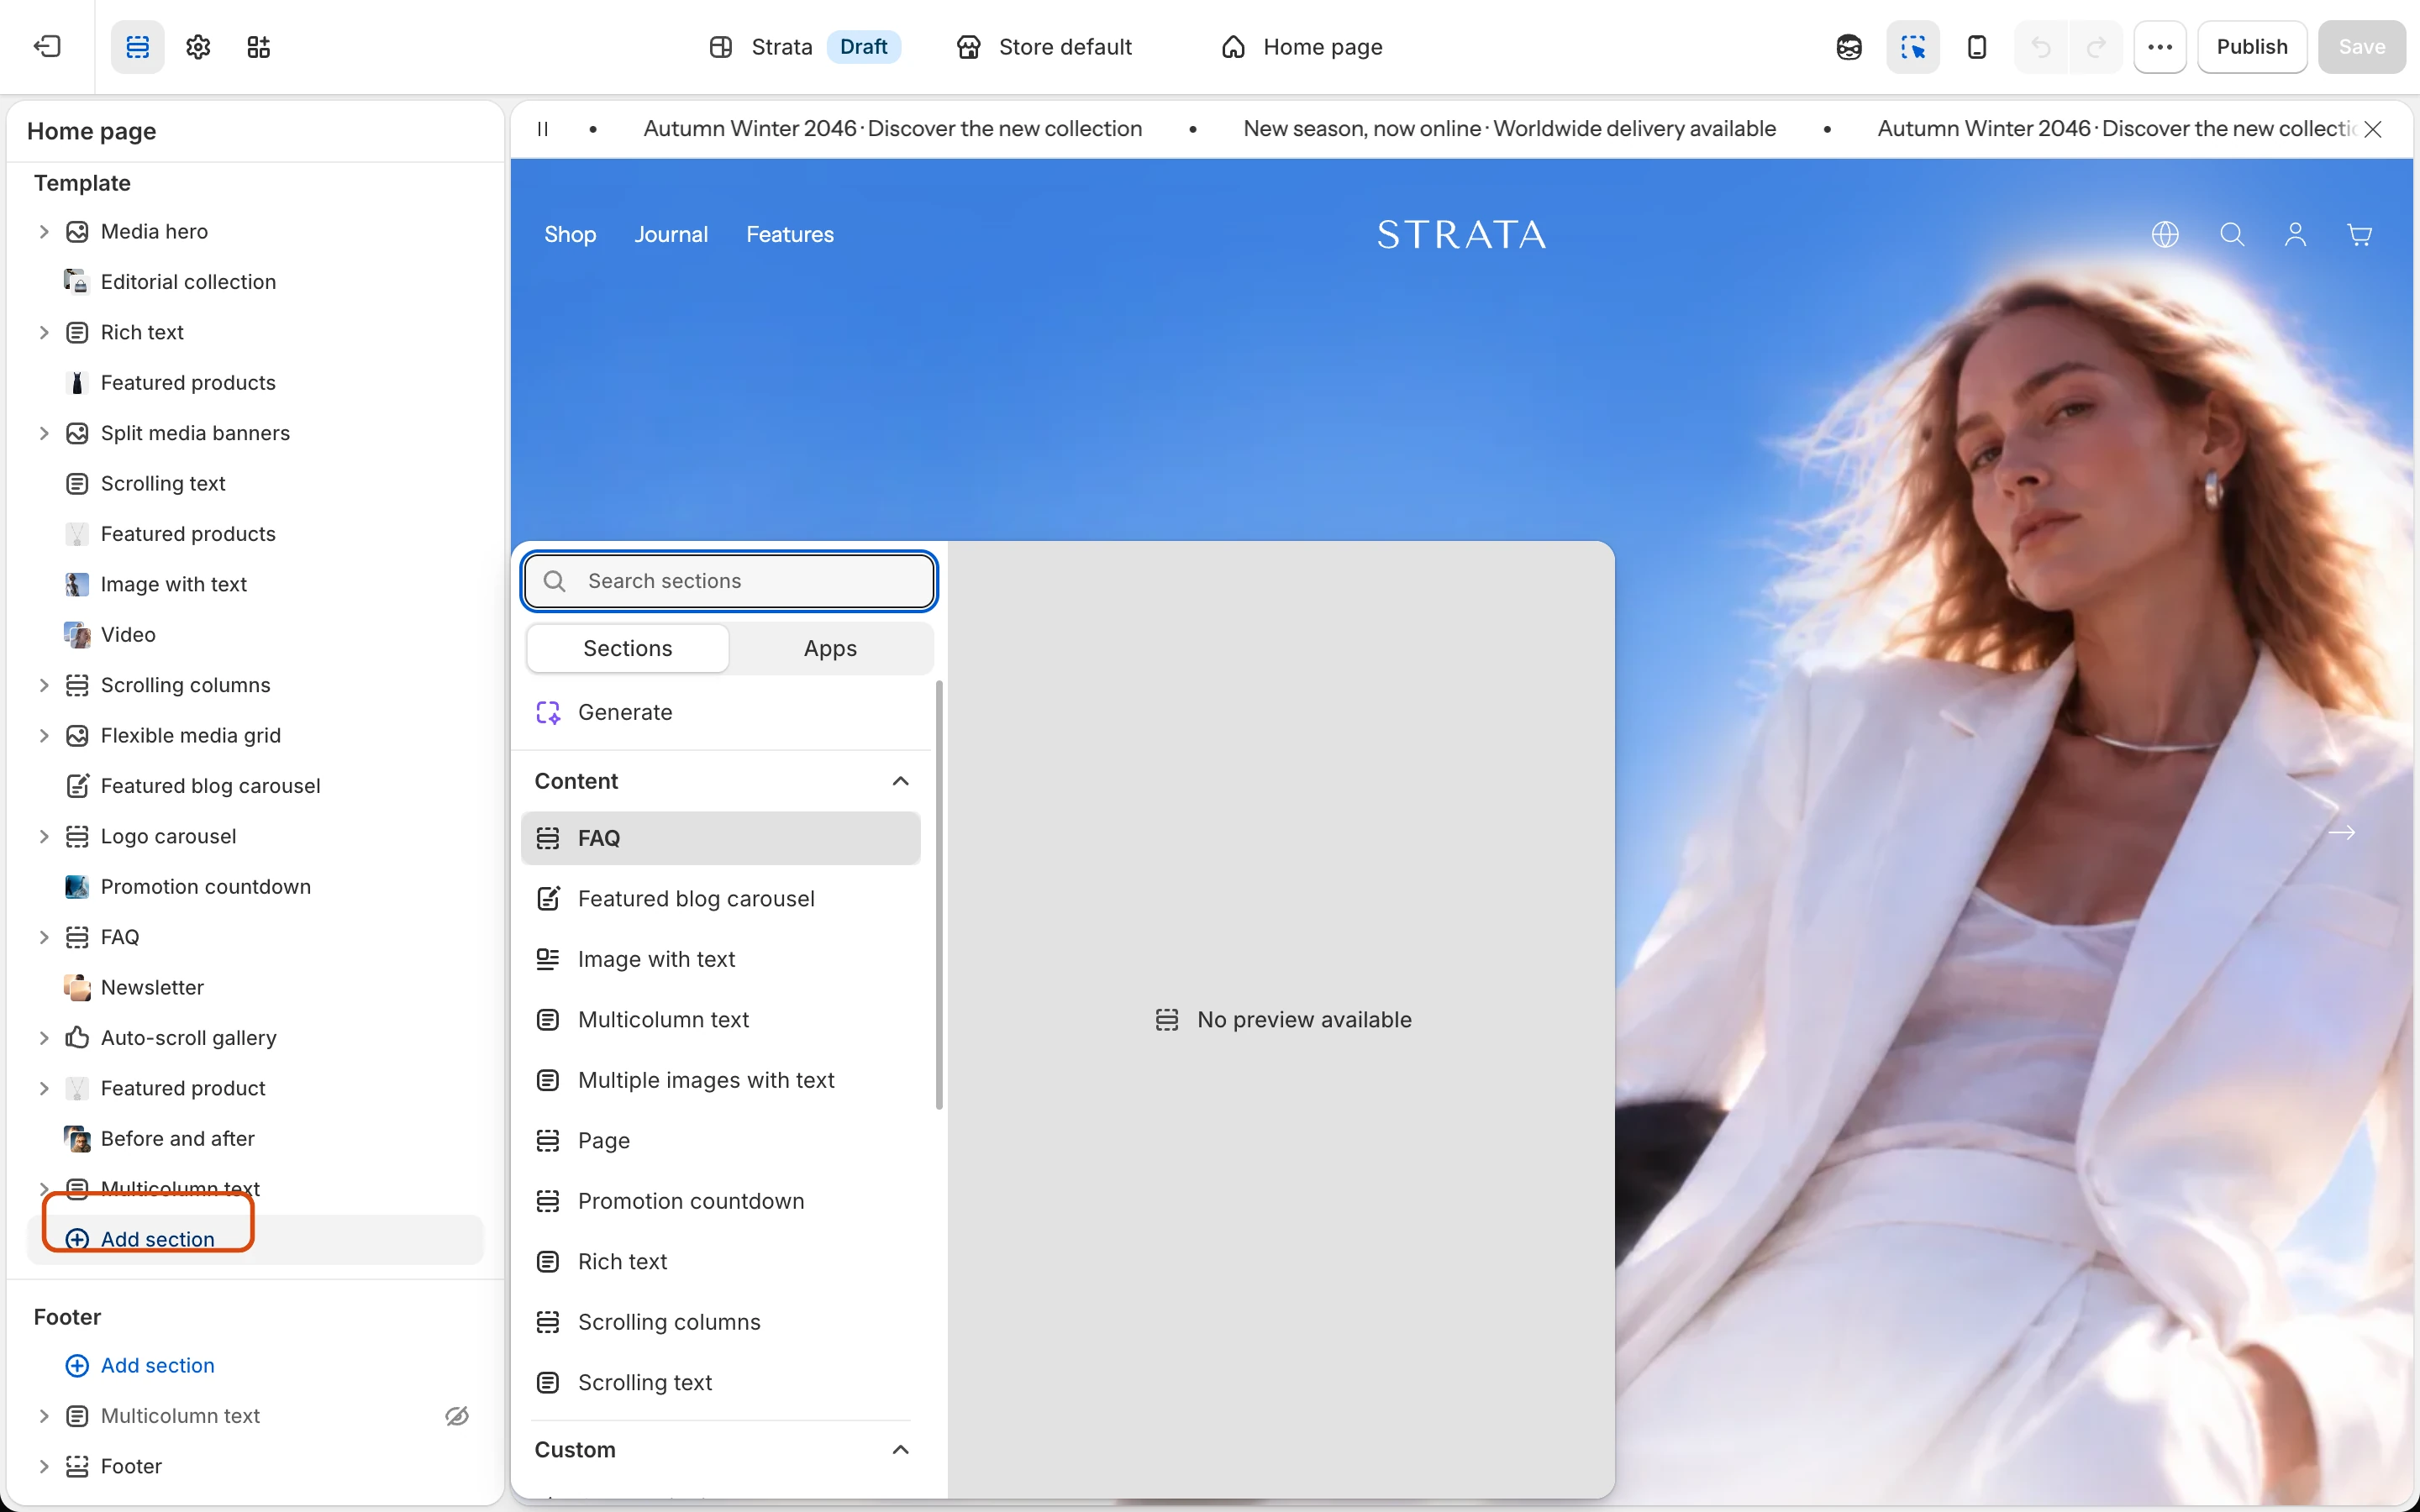
The Add section picker open beside the sidebar, with a search field and a list of Content sections such as FAQ, Featured blog carousel, and Image with text.

Select Add section (outlined) under a group, then search for a section or choose one from the list.

Open Theme settings
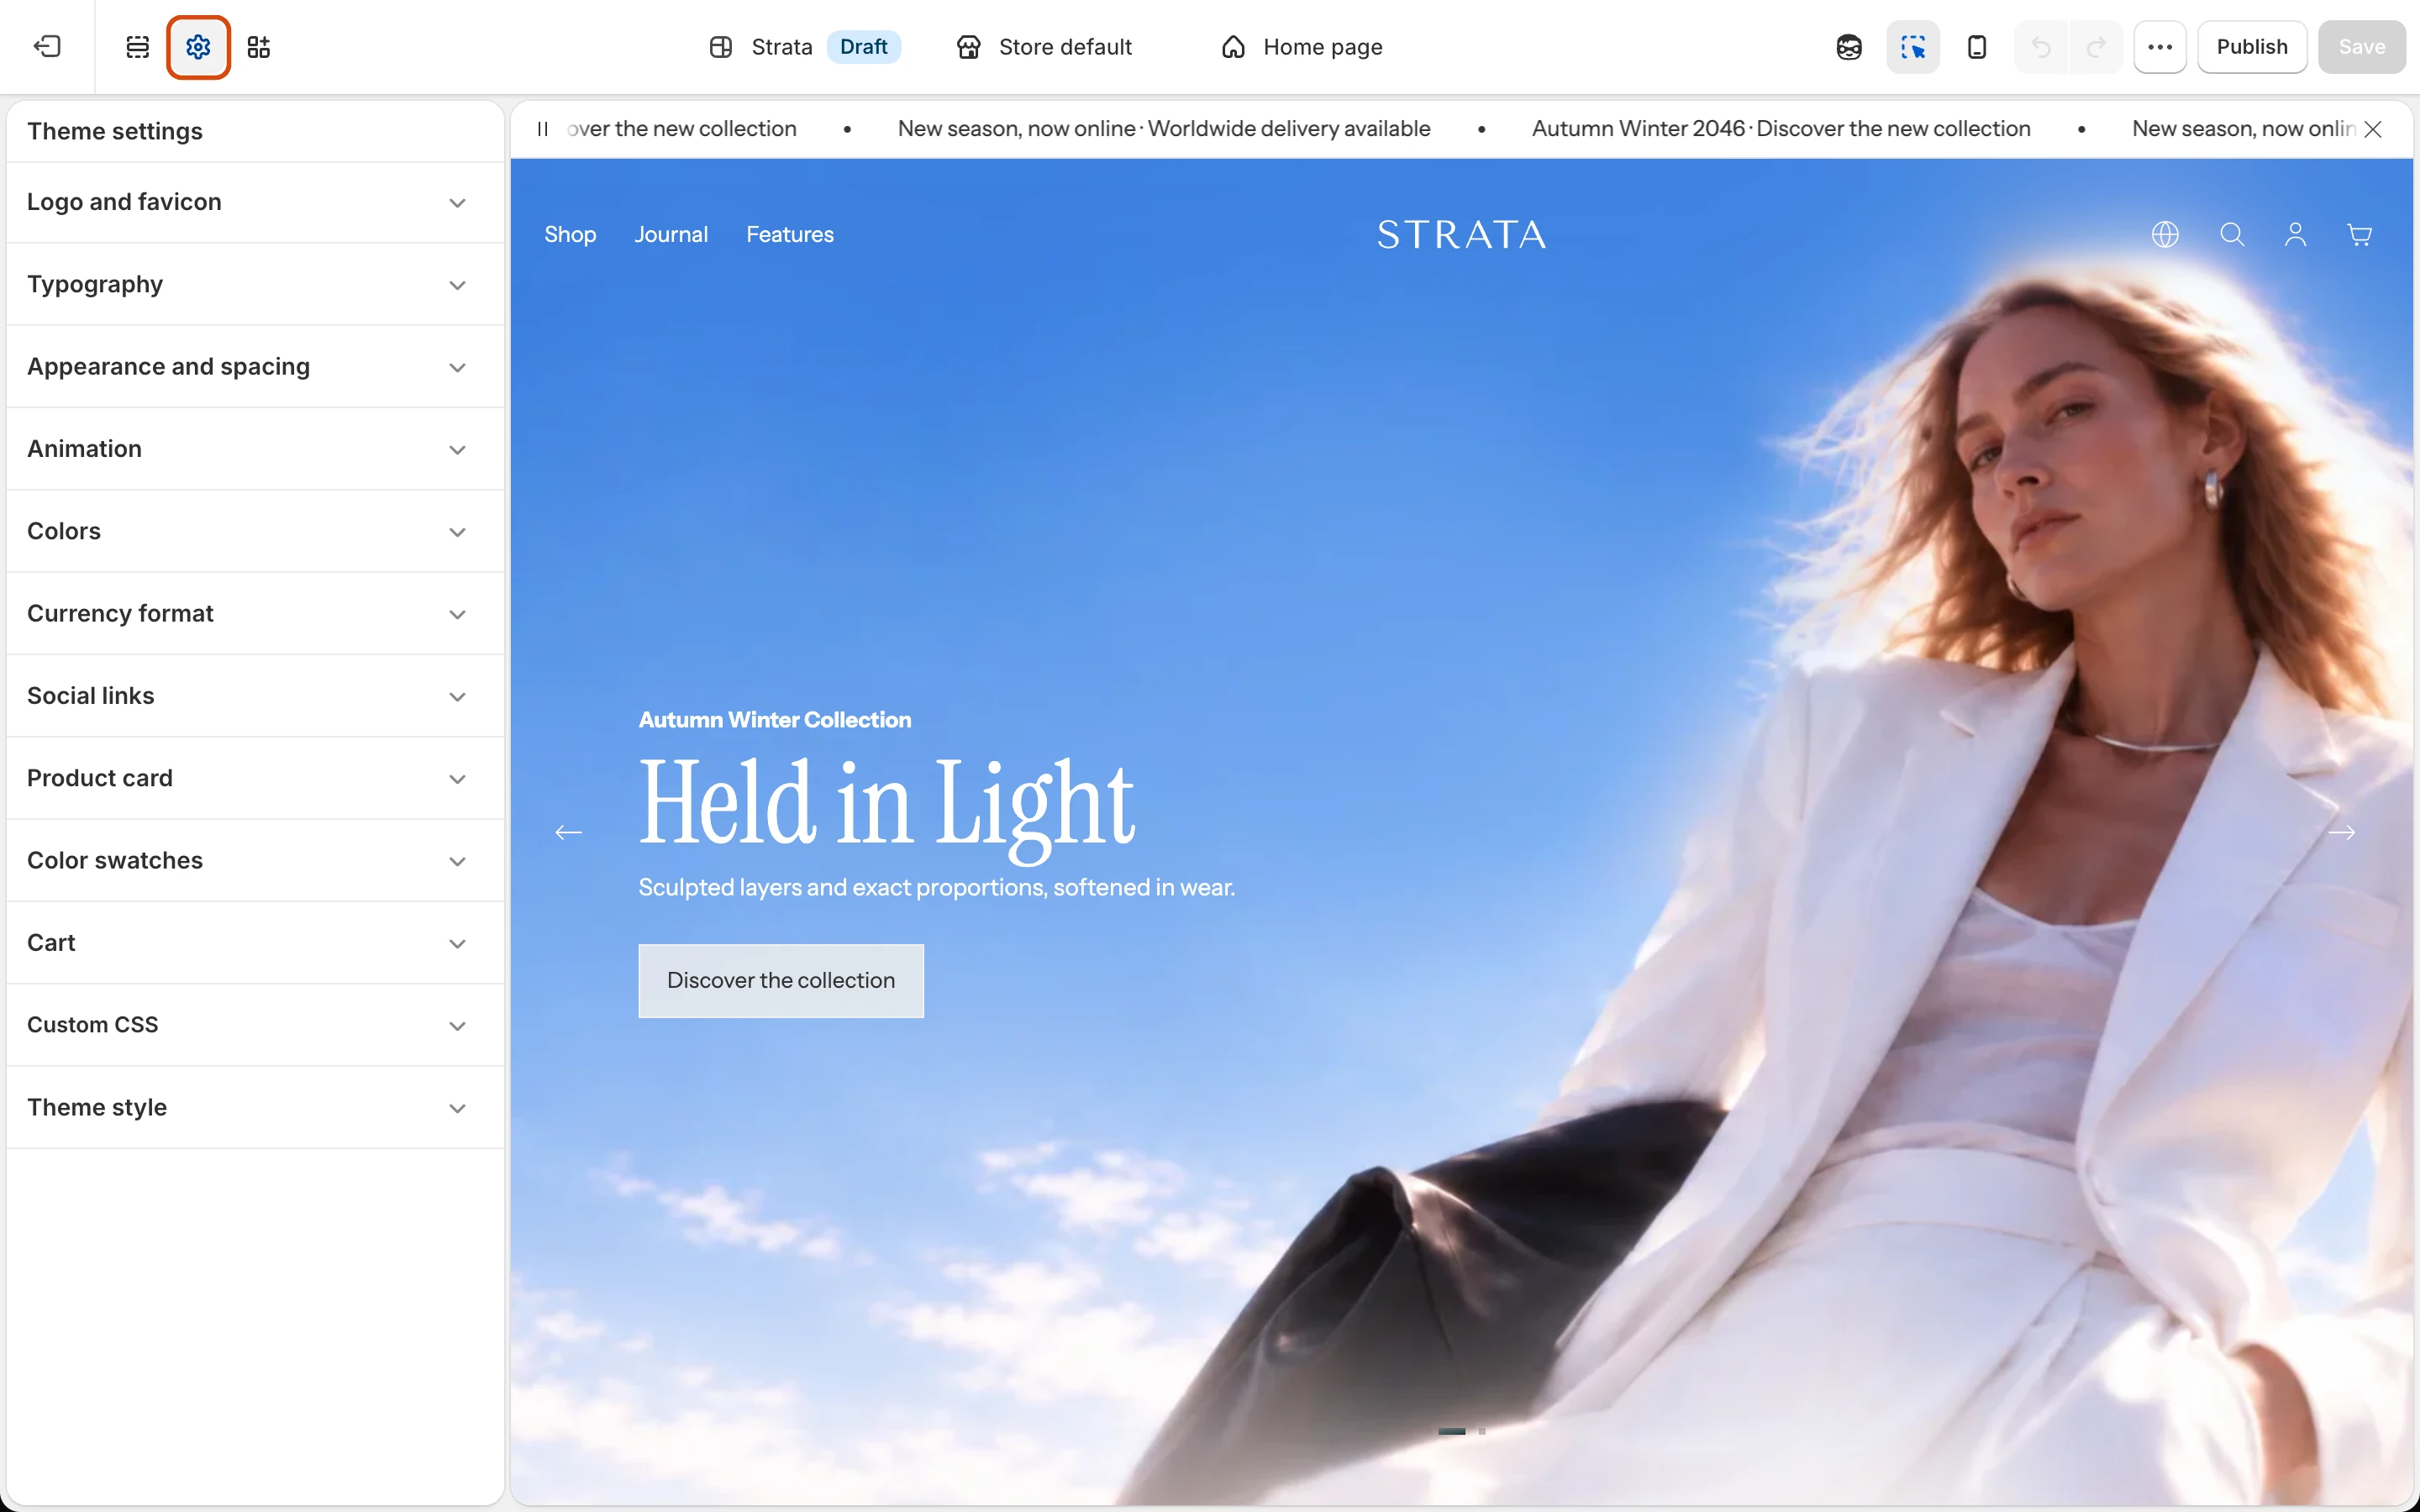
The Theme settings panel listing Logo and favicon, Typography, Appearance and spacing, Animation, Colors, Currency format, Social links, Product card, Color swatches, Cart, Custom CSS, and Theme style.

Select the gear icon (outlined) to open Theme settings. Each heading opens one group of settings.

Before publishing

Storefront review
Complete these checks in the preview theme before making it live.
  • Global storefrontCheck the header, navigation, search, cart, and footer.
  • Product statesOpen a product with multiple variants and a sold-out product.
  • Used templatesCheck the home page and every template assigned to store content.
  • Shopify setupConfirm markets, currencies, policies, payments, and shipping in Shopify.
  • Rollback copyKeep the previous live theme available until the new version is confirmed.

Search documentation

Search across the Strata guide